OctoPrint with multiple 3D printers

One of the most useful tools when managing a 3D printer is OctoPrint, since among several things it allows you to manage your printer from a web interface, as well as adding a lot of functionality (for example, monitoring and management of the printer through Telegram, plugins to generate timelapse videos of the prints, or even detect when there are spaghetti-like problems in our prints using another plugin with AI).
Multiple printers
But what if we have more than one printer? Can OctoPrint manage more than one printer?
The short answer is: NO! The software itself is not designed for multiple printers, but you can find alternative ways to have more than one instance of OctoPrint running on your device or computer.
There are several ways to do this, for example you can modify the OctoPi scripts to add more instances, create scripts that launch multiple instances of the same program, but the option I ended up using was Docker containers.
Raspberry Pi + Ubuntu
In my case I have a Raspberry Pi 4, with 8 GB of RAM, more than enough to run multiple instances of OctoPrint.
I originally had a specific operating system installed on my Raspberry called OctoPi, a Debian derivative with OctoPrint as the main program that is launched when the Raspberry Pi is turned on, but as I wanted to use containers I decided to use Ubuntu, which general purposed distribution where you can surely find everything you need to work with containers.
Requirements and components:
For this setup I used the following:
- Impresora 3D - Artillery Genius Pro
- Impresora 3D - Artillery SideWinder X2
- 2x WebCam - Logitech C270 (one per printer)
- Raspberry Pi 4 - 8G RAM
- SD Card 64 GB
- Ubuntu 22.04 LTS ARM 64 bits
- Docker 20.10.17
- OctoPrint lastest (1.8.3)
Ubuntu Installation
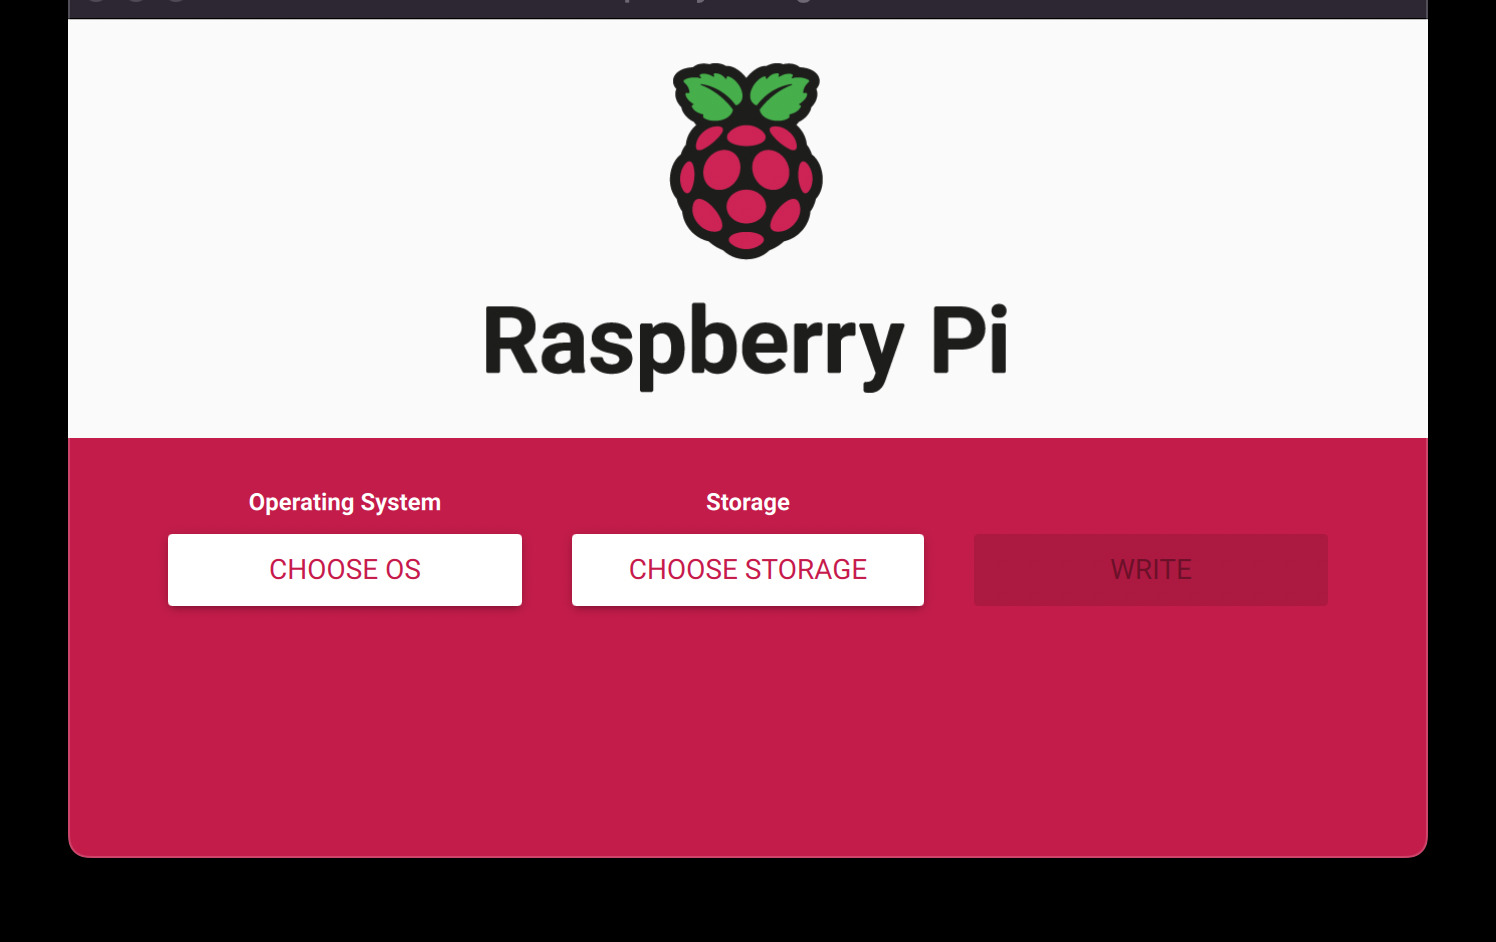
Nowadays is easier than ever to install Ubuntu on the Raspberry Pi, you just have to download Raspberry Pi Imager, which will generate the image on your SD card, select the operating system, which in this case is Ubuntu 22.04 LTS and you’re done. Raspberry Pi Imager is avialable for Linux, Mac and Windows, so you can generate the image on the operating system that suits you best.
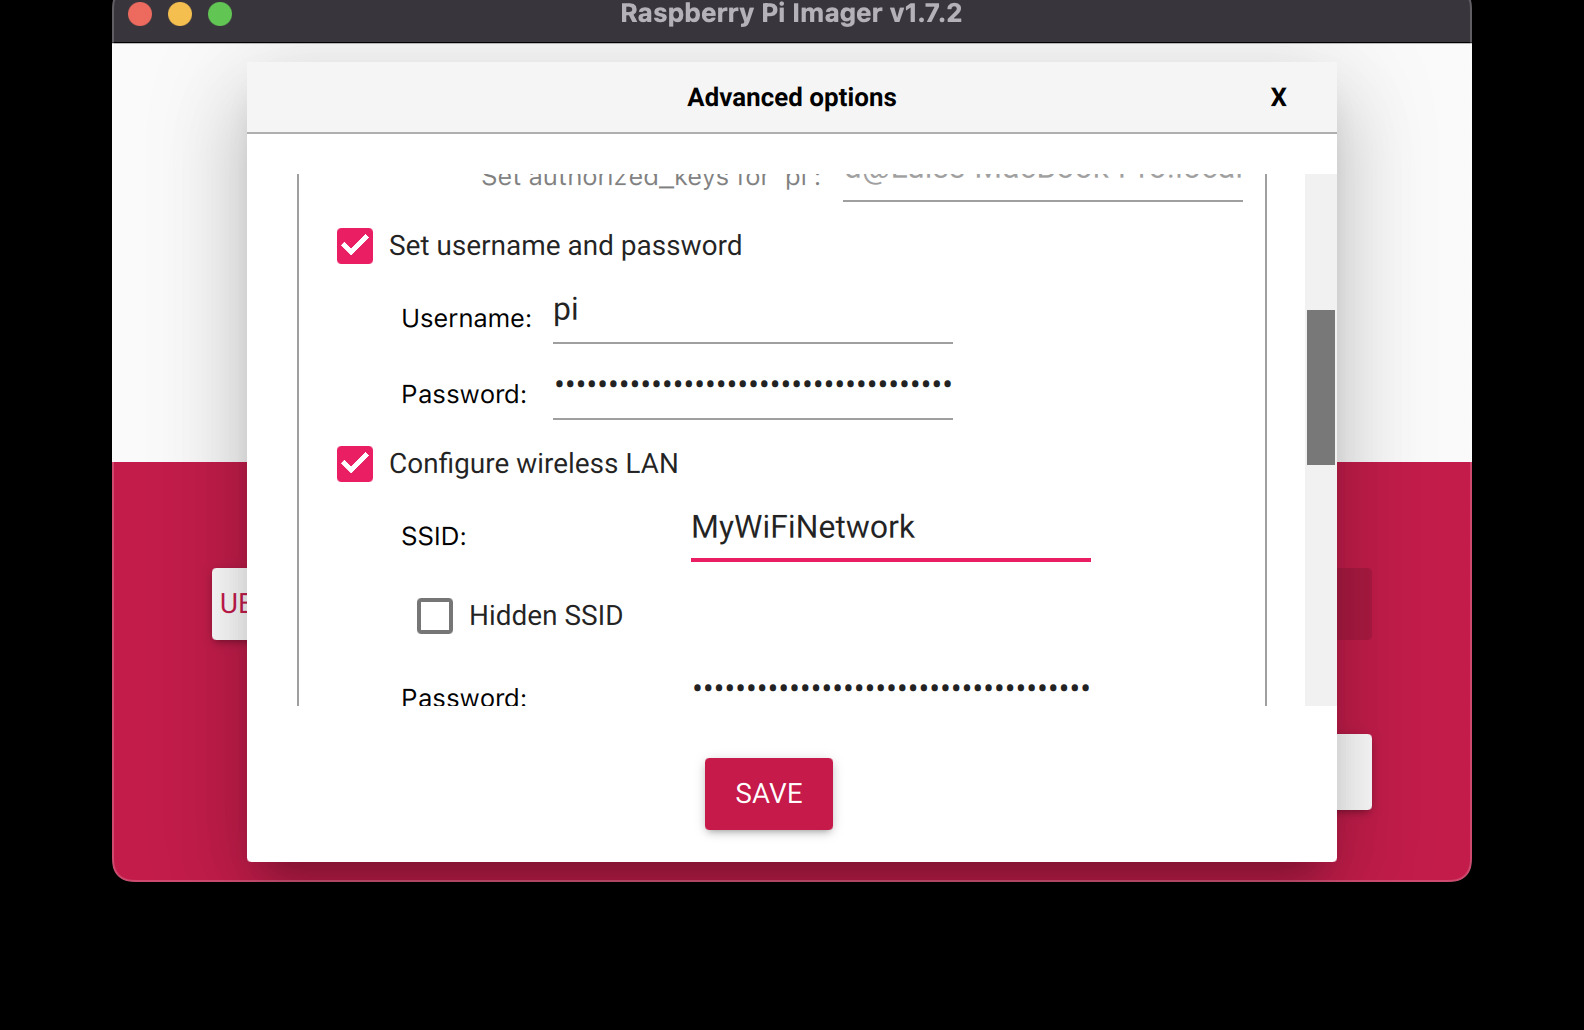
From this very software you will have the possibility to configure the password of the WiFi network in case you are using the Raspberry wirelessly, so you don’t need to use a television set and a keyboard (headless), or manipulate the SD card to configure the networking. Since I’m using it headless, that’s what I did and then I connected via ssh.
For the headless setup the trick is to let the Ubuntu initialization scripts run and then connect via ssh. Now if you see that you can’t connect via ssh you can look for an HDMI cable and a keyboard to check what might be going on.
Software installation on Ubuntu
Apart from Docker we are going to need docker-compose, and the utilities that will help us install them.
Docker and docker-compose
To install docker you need to download it using the script. You will need to loging in as the administrator user with the root account:
pi@octopi:~$ sudo su
root@octopi:~#

root@octopi:~# apt install curl
root@octopi:~# curl -sSL https://get.docker.com | sh

root@octopi:~# apt update
root@octopi:~# apt install docker-compose
OctoPrint with one printer
The first thing you need is to create a folder for OctoPrint, and then go into it:
root@octopi:~# mkdir octoprint
root@octopi:~#
root@octopi:~# cd octoprint/
root@octopi:~/octoprint#
Let’s start with a printer, in this case I’ll start with the Artillery Genius Pro. For this you can create a folder that identifies this printer:
root@octopi:~# mkdir geniuspro
root@octopi:~# chmod -R 777 geniuspro/
It’s important to know the actual path because you’ll use it later in the container definition along with the name of this folder. To do this, execute the following command:
root@octopi:~# pwd
/root/octoprint
With this you can indicate the files of this first instance of OctoPrint will reside in /root/octoprint/geniuspro
Now to configure the printer you need to use docker-compose so you need to create the docker-compose.yml file with the following information:
version: '2.4'

services:
  geniuspro:
    image: octoprint/octoprint
    restart: unless-stopped
    ports:
      - 5000:5000
      - 8080:8080
    devices:
      - /dev/ttyACM0:/dev/ttyACM0
      - /dev/video0:/dev/video0
    volumes:
      - /root/octoprint/geniuspro:/octoprint
    # uncomment the lines below to ensure camera streaming is enabled when
    # you add a video device
    environment:
      - ENABLE_MJPG_STREAMER=true
      - CAMERA_DEV=/dev/video0
      - MJPG_STREAMER_INPUT="-y -n -r 1280x960 -f 30
This file defines various things related to OctoPrint, such as the webcam and the printer itself. For example, image indicates which Docker image to use for the geniuspro service.
Notice the ports definitions, where 5000 will be used for the web interface and 8080 for webcam streaming video.
On the other hand, the printer is defined as a device in /dev/ttyACM0, and the webcam in /dev/video0
Something to keep in mind and that differs from the example on which I based, is that the streamer is now part of the Docker image and is served on port 8080, so there is no need to have a separate definition of another Docker image pointing to the streamer.
volumes has the reference to the printer directory that you had created as /root/octoprint/geniuspro, which will be mapped into the container as the /octoprint folder. That is, when we launch the container all the OctoPrint files for this printer will be in the /root/octoprint/geniuspro path of the operating system.
Finally, environment has the streamer parameters, like webcam device from the container. In this case both the OS and the container match the path /dev/video0. Here you also need to provide you webcam parameters, in my case I indicated that the resolution is 1280x960 at 30 frames per second, which is what corresponds to my Logitech C270. For other models you can consult the supported cameras list page.
Once the docker-compose.yml file has been created with the information shown above, all you have to do is start the service with Docker:
root@octopi:~/octoprint# docker-compose up -d

Creating octoprint_geniuspro_1 ... done
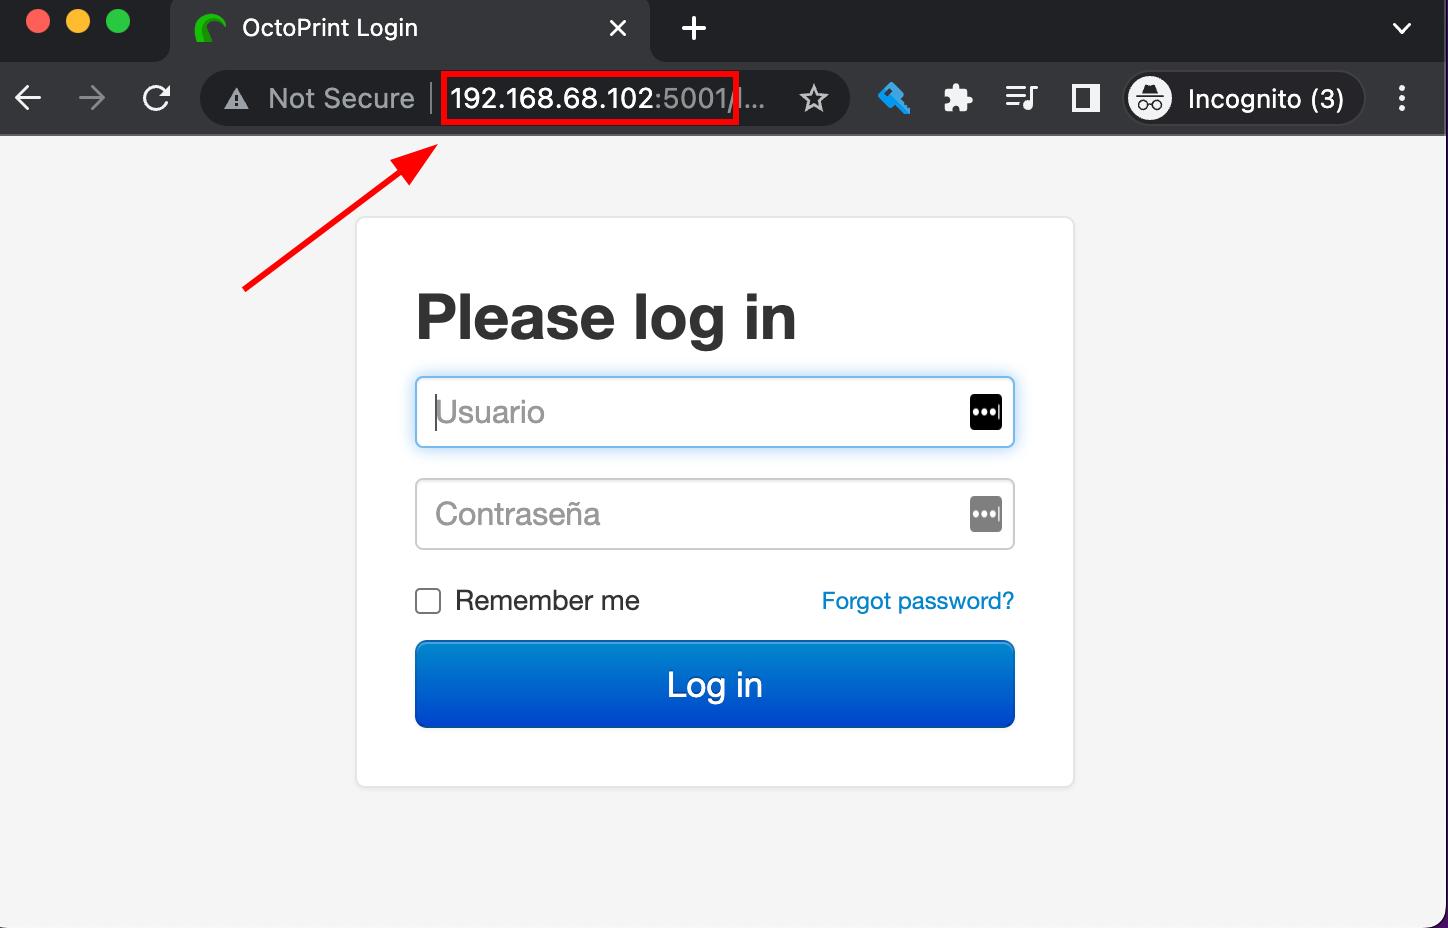
With this we can access the OctoPrint web interface from the Raspberry Pi on the port that we had indicated, in my case the url is http://192.168.68.102:5000:

Adding a second printer
To add a second printer, you just have to replicate the configuration you had before, but specifying the new printer and the corresponding video camera. So for my Artillery Sidewinder X2 this would be:
version: '2.4'

services:
  geniuspro:
    image: octoprint/octoprint
    restart: unless-stopped
    ports:
      - 5000:5000
      - 8080:8080
    devices:
      - /dev/ttyACM0:/dev/ttyACM0
      - /dev/video0:/dev/video0
    volumes:
      - /root/octoprint/geniuspro:/octoprint
    # uncomment the lines below to ensure camera streaming is enabled when
    # you add a video device
    environment:
      - ENABLE_MJPG_STREAMER=true
      - CAMERA_DEV=/dev/video0
      - MJPG_STREAMER_INPUT="-y -n -r 1280x960 -f 30

  sidewinder_x2:
    image: octoprint/octoprint
    restart: unless-stopped
    ports:
      - 5000:5000
      - 8080:8080
    devices:
      - /dev/ttyACM1:/dev/ttyACM0
      - /dev/video2:/dev/video0
    volumes:
      - /root/octoprint/geniuspro:/octoprint
    # uncomment the lines below to ensure camera streaming is enabled when
    # you add a video device
    environment:
      - ENABLE_MJPG_STREAMER=true
      - CAMERA_DEV=/dev/video0
      - MJPG_STREAMER_INPUT="-y -n -r 1280x960 -f 30
Take into account the phycal printer is identified as /dev/ttyACM1 in the Raspberry , but the container internally it will be see it as /dev/ttyACM0. The same goes for the video camera, where it is physically identified as /dev/video2 but internally the container will see it as /dev/video0.
Once the configuration has been created, the container must be run as follows:
root@octopi:~/octoprint# docker-compose up -d

octoprint_geniuspro_1 is up-to-date
Creating octoprint_sidewinderx2_1 ... done
This will now allow access to the second instance of OctoPrint on port 5001:
How to differentiate printers?
In the example above I used the devices /dev/ttyACM0 and /dev/ttyACM1 to reference my first printer, the Artillery Genius Pro, and my second printer, the Artillery SideWinder X2, but the operating system not always takes that order, since it will depend on which one you had turned on first. In order to identify the printers regardless of the connection order we can create a symbolic link using udev with the manufacturer and product information.
For this, you have first list the USB devices:
root@octopi:~/octoprint# lsusb
Bus 003 Device 001: ID 1d6b:0002 Linux Foundation 2.0 root hub
Bus 002 Device 001: ID 1d6b:0003 Linux Foundation 3.0 root hub
Bus 001 Device 004: ID 046d:0825 Logitech, Inc. Webcam C270
Bus 001 Device 003: ID 046d:0825 Logitech, Inc. Webcam C270
Bus 001 Device 015: ID 0483:5740 STMicroelectronics Virtual COM Port
Bus 001 Device 016: ID 0483:5740 STMicroelectronics Virtual COM Port
Bus 001 Device 002: ID 2109:3431 VIA Labs, Inc. Hub
Bus 001 Device 001: ID 1d6b:0002 Linux Foundation 2.0 root hub
There are two STMicroelectronics Virtual COM Port devices here, corresponding to the two printers, but which is which? We are going to ask for the detail of these devices:
 root@octopi:~/octoprint# lsusb -v -d 0483:5740

Bus 001 Device 015: ID 0483:5740 STMicroelectronics Virtual COM Port
Device Descriptor:
  bLength                18
  bDescriptorType         1
  bcdUSB               2.00
  bDeviceClass            2 Communications
  bDeviceSubClass         2 Abstract (modem)
  bDeviceProtocol         0
  bMaxPacketSize0        64
  idVendor           0x0483 STMicroelectronics
  idProduct          0x5740 Virtual COM Port
  bcdDevice            0.00
  iManufacturer           1 STMicroelectronics
  iProduct                2 ARTILLERY_RUBY CDC in FS Mode
  iSerial                 3 386F39543538
...

Bus 001 Device 016: ID 0483:5740 STMicroelectronics Virtual COM Port
Device Descriptor:
  bLength                18
  bDescriptorType         1
  bcdUSB               2.00
  bDeviceClass            2 Communications
  bDeviceSubClass         2 Abstract (modem)
  bDeviceProtocol         0
  bMaxPacketSize0        64
  idVendor           0x0483 STMicroelectronics
  idProduct          0x5740 Virtual COM Port
  bcdDevice            0.00
  iManufacturer           1 STMicroelectronics
  iProduct                2 ARTILLERY_RUBY CDC in FS Mode
  iSerial                 3 3594398F3538
...
What differentiates one printer from another is the serial number of the device. Since the Artillery Genius Pro was initially mapped to /dev/ttyACM0, we can check what its serial number is:
root@octopi:~/octoprint# udevadm info -a -n /dev/ttyACM0 | grep serial
    ATTRS{serial}=="3594398F3538"
    ATTRS{serial}=="0000:01:00.0"
Now to see the serial code of the Artillery Sidewinder X2 you have to consult the device /dev/ttyACM1:
root@octopi:~/octoprint# udevadm info -a -n /dev/ttyACM1 | grep serial
    ATTRS{serial}=="386F39543538"
    ATTRS{serial}=="0000:01:00.0"
For udev to recognize these rules we must create the following file /etc/udev/rules.d/40-printers.rules , with this content:
 # Genius Pro
KERNEL=="ttyACM[0-9]*", SUBSYSTEM=="tty", ATTRS{idVendor}=="0483", ATTRS{idProduct}=="5740", ATTRS{serial}=="3594398F3538", SYMLINK="ttyGeniusPro"

# Sidewinder X2
KERNEL=="ttyACM[0-9]*", SUBSYSTEM=="tty", ATTRS{idVendor}=="0483", ATTRS{idProduct}=="5740", ATTRS{serial}=="386F39543538", SYMLINK="ttySidewinderX2"
Then udev must be restarted to take these changes:
root@octopi:~/octoprint# udevadm control --reload-rules && udevadm trigger
This way the printers will be mapped as follows:
root@octopi:~/octoprint# ls -l  /dev/tty{GeniusPro,Sidewinder}*
lrwxrwxrwx 1 root root 7 Aug 22 21:10 /dev/ttyGeniusPro -> ttyACM0
lrwxrwxrwx 1 root root 7 Aug 22 21:10 /dev/ttySidewinderX2 -> ttyACM1
So the Docker configuration can be modified to reflect these changes:
version: '2.4'

services:
  geniuspro:
    image: octoprint/octoprint
    restart: unless-stopped
    ports:
      - 5000:5000
      - 8080:8080
    devices:
      - /dev/ttyGeniusPro:/dev/ttyACM0
      - /dev/video0:/dev/video0
    volumes:
      - /root/octoprint/geniuspro:/octoprint
    # uncomment the lines below to ensure camera streaming is enabled when
    # you add a video device
    environment:
      - ENABLE_MJPG_STREAMER=true
      - CAMERA_DEV=/dev/video0
      - MJPG_STREAMER_INPUT="-y -n -r 1280x960 -f 30

  sidewinderx2:
    image: octoprint/octoprint
    restart: unless-stopped
    ports:
      - 5001:5000
      - 8081:8080
    devices:
      - /dev/ttySidewinderX2:/dev/ttyACM0
      - /dev/video2:/dev/video0
    volumes:
      - /root/octoprint/sidewinderx2:/octoprint
    # uncomment the lines below to ensure camera streaming is enabled when
    # you add a video device
    environment:
      - ENABLE_MJPG_STREAMER=true
      - CAMERA_DEV=/dev/video0
      - MJPG_STREAMER_INPUT="-y -n -r 1280x960 -f 30
Webcams
Unlike printers which have different serial numbers, I have two Logitech C270 webcams that are exactly the same model. How can we differente them? How can we make the OS to take the right camera?
Again we do the analysis with lsusb:
root@octopi:~/octoprint# lsusb
Bus 003 Device 001: ID 1d6b:0002 Linux Foundation 2.0 root hub
Bus 002 Device 001: ID 1d6b:0003 Linux Foundation 3.0 root hub
Bus 001 Device 004: ID 046d:0825 Logitech, Inc. Webcam C270
Bus 001 Device 003: ID 046d:0825 Logitech, Inc. Webcam C270
Bus 001 Device 015: ID 0483:5740 STMicroelectronics Virtual COM Port
Bus 001 Device 016: ID 0483:5740 STMicroelectronics Virtual COM Port
Bus 001 Device 002: ID 2109:3431 VIA Labs, Inc. Hub
Bus 001 Device 001: ID 1d6b:0002 Linux Foundation 2.0 root hub
Both cameras are on the same bus but identified as different USB devices, which we can take advantage of. In this case we will not use the product id to differentiate them but the USB device id. We’ll be referencing the video4linux subsystem instead of tty, so we’ll be using KERNELS instead of KERNEL to differentiate cameras. For example, to find out which USB device the camera in /dev/video0 is on, we can run the following:
root@octopi:~/octoprint# udevadm info -a -p  $(udevadm info -q path -n /dev/video0) | grep KERNELS
    KERNELS=="1-1.4:1.0"
    KERNELS=="1-1.4"
    KERNELS=="1-1"
    KERNELS=="usb1"
    KERNELS=="0000:01:00.0"
    KERNELS=="0000:00:00.0"
    KERNELS=="pci0000:00"
    KERNELS=="fd500000.pcie"
    KERNELS=="scb"
    KERNELS=="platform"
For the other camera we do the same:
root@octopi:~/octoprint# udevadm info -a -p  $(udevadm info -q path -n /dev/video2) | grep KERNELS
    KERNELS=="1-1.3:1.0"
    KERNELS=="1-1.3"
    KERNELS=="1-1"
    KERNELS=="usb1"
    KERNELS=="0000:01:00.0"
    KERNELS=="0000:00:00.0"
    KERNELS=="pci0000:00"
    KERNELS=="fd500000.pcie"
    KERNELS=="scb"
    KERNELS=="platform"
Now with this information we can modify the udev rules as follows:
# Genius Pro
KERNEL=="ttyACM[0-9]*", SUBSYSTEM=="tty", ATTRS{idVendor}=="0483", ATTRS{idProduct}=="5740", ATTRS{serial}=="3594398F3538", SYMLINK="ttyGeniusPro"
SUBSYSTEM=="video4linux", KERNELS=="1-1.3", ATTRS{idVendor}=="046d", ATTRS{idProduct}=="0825", SYMLINK="videoGeniusPro"

# Sidewinder X2
KERNEL=="ttyACM[0-9]*", SUBSYSTEM=="tty", ATTRS{idVendor}=="0483", ATTRS{idProduct}=="5740", ATTRS{serial}=="386F39543538", SYMLINK="ttySidewinderX2"
SUBSYSTEM=="video4linux", KERNELS=="1-1.4", ATTRS{idVendor}=="046d", ATTRS{idProduct}=="0825", SYMLINK="videoSidewinderX2"
Remember to reset the udev rules with:
root@octopi:~/octoprint# udevadm control --reload-rules && udevadm trigger
So now we have the cameras mapped to /dev/videoGeniusPro and /dev/videoSidewinderX2 respectively. Now we can modify the docker-compose.yml file to take this new configuration:
version: '2.4'

services:
  geniuspro:
    image: octoprint/octoprint
    restart: unless-stopped
    ports:
      - 5000:5000
      - 8080:8080
    devices:
      - /dev/ttyGeniusPro:/dev/ttyACM0
      - /dev/videoGeniusPro:/dev/video0
    volumes:
      - /root/octoprint/geniuspro:/octoprint
    # uncomment the lines below to ensure camera streaming is enabled when
    # you add a video device
    environment:
      - ENABLE_MJPG_STREAMER=true
      - CAMERA_DEV=/dev/video0
      - MJPG_STREAMER_INPUT="-y -n -r 1280x960 -f 30

  sidewinderx2:
    image: octoprint/octoprint
    restart: unless-stopped
    ports:
      - 5001:5000
      - 8081:8080
    devices:
      - /dev/ttySidewinderX2:/dev/ttyACM0
      - /dev/videoSidewinderX2:/dev/video0
    volumes:
      - /root/octoprint/sidewinderx2:/octoprint
    # uncomment the lines below to ensure camera streaming is enabled when
    # you add a video device
    environment:
      - ENABLE_MJPG_STREAMER=true
      - CAMERA_DEV=/dev/video0
      - MJPG_STREAMER_INPUT="-y -n -r 1280x960 -f 30
Performance with two instances of OctoPrint
Probably you are wondering about the consumption of these containers in the operating system and if the Raspberry can handle it. Here is an image of htop with the two containers above printing to each of the printers at the same time.
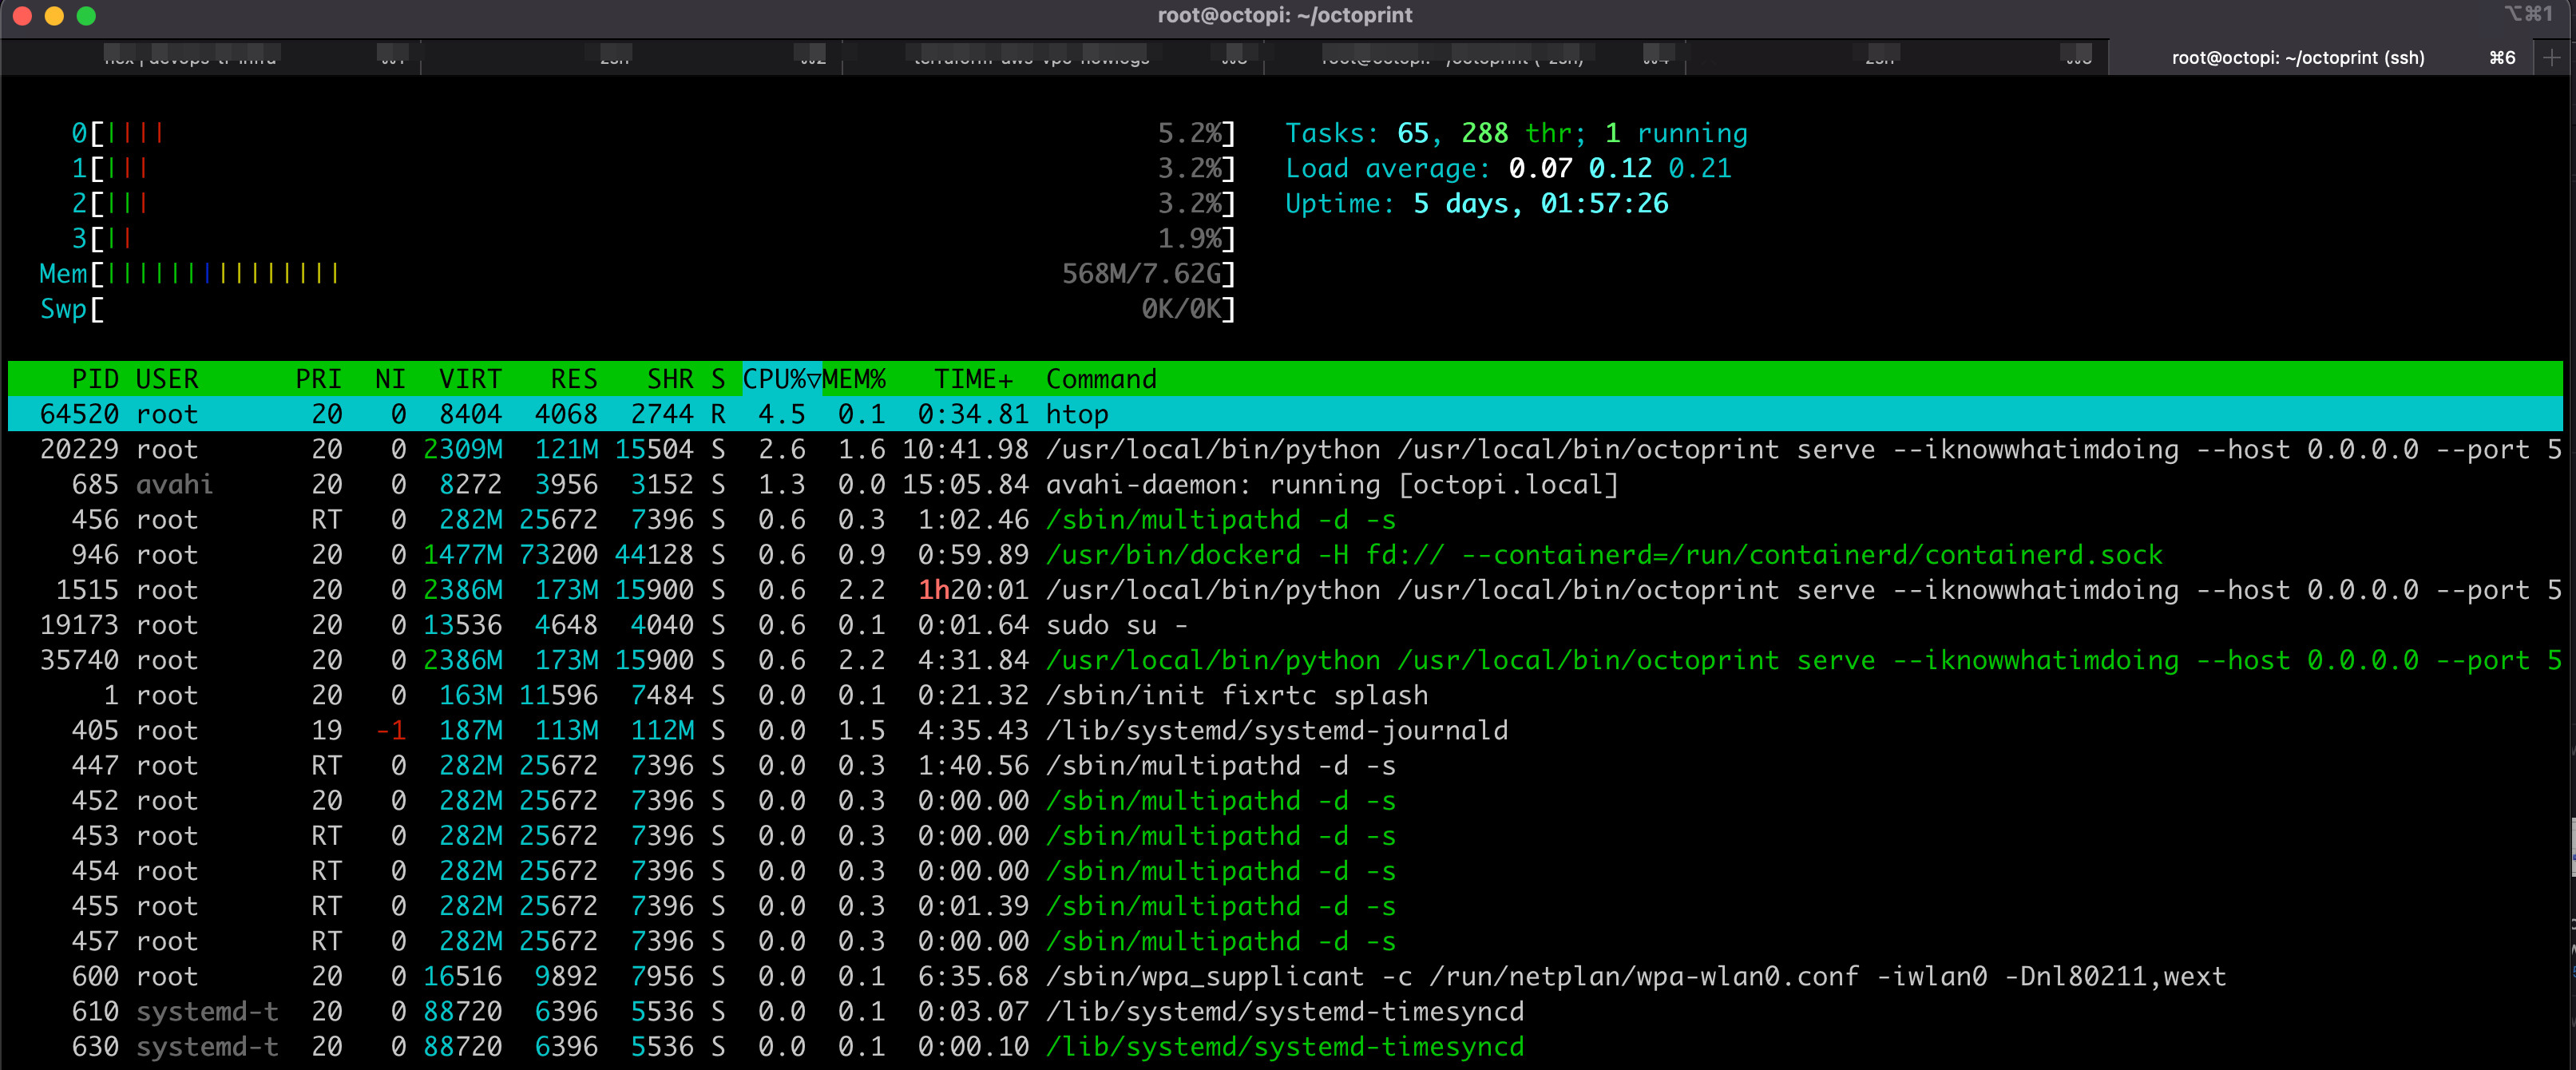
As you can see the Raspberry has a lot of resources available, since of the 8GB of RAM it is only consuming 0.5 GB including the operating system. From this we can draw two conclusions: the first one is that more printers can be added without problems, the only limit is the number of USB ports offered by the Raspberry (4 in my model), but you could add a USB hub to add more ports; and the second conclusion is that for two printers you could use a Raspberry with less RAM, for example 2 GB or 4 GB, and thus you would save a little.
What does the Raspberry Pi and printers look like?
To finish this article I leave you a photo of my printers connected to the RaspBerry Pi:
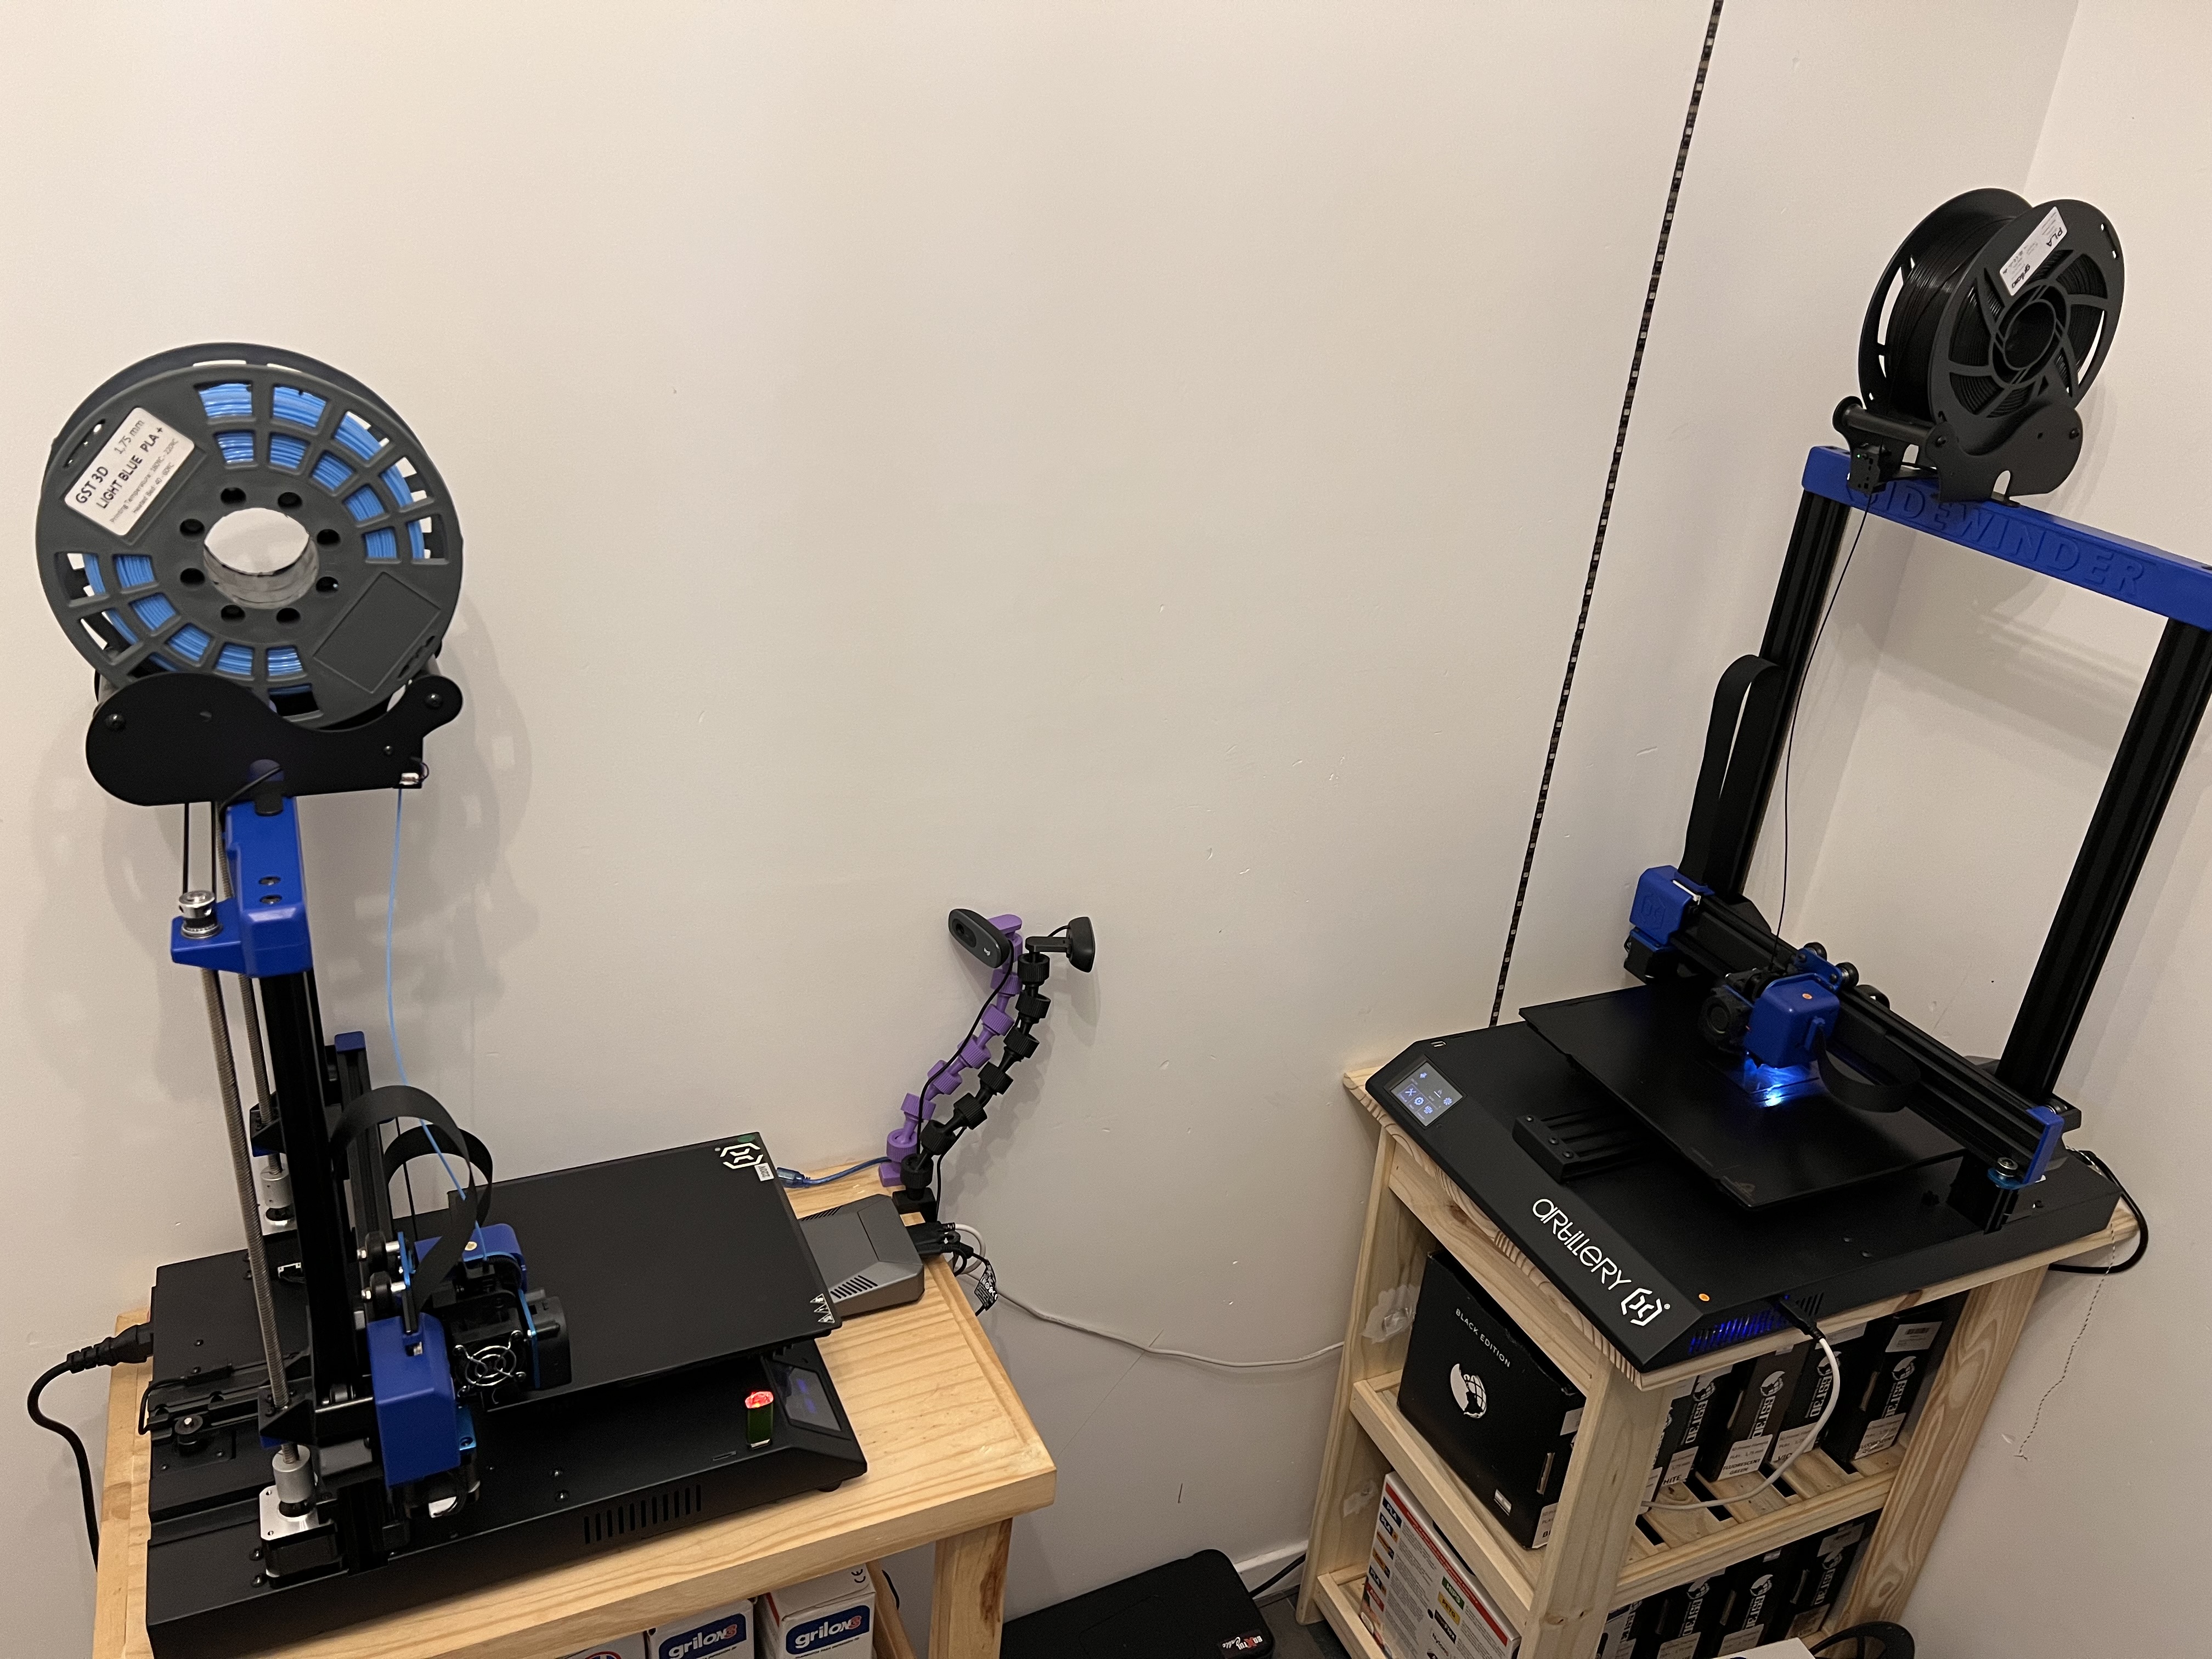
On the smaller printer you can see a small gray box that is the Raspberry Pi, next to the two web cameras.
References
- OctoPrint
- OctoPi
- Setting up OctoPrint on a Raspberry Pi for multiple printers
- Installing OctoPrint using Docker in Linux (video tutorial)
- Installing OctoPrint using Docker in Linux (instructions)
- USB webcams known to work with mjpg-streamer.
- How to distinguish between identical USB-to-serial adapters?
- Udev Rule to discern 2 identical webcams on Linux