iPad Pro as portable workstation
It’s been a while since I posted on the blog, first because I couldn’t find something interesting to share and second because there wasn’t much spare time (It’s not that now there’s a lot of time to spare but well, one make some time to write a few lines).
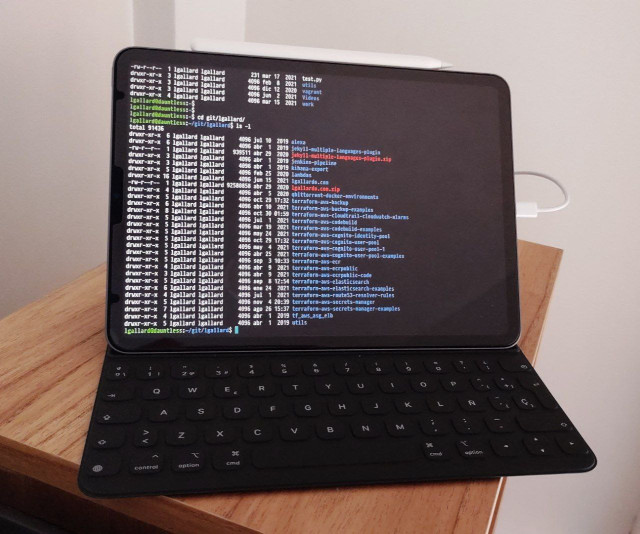
The truth is I recently got an iPad Pro 11” and among the things I tried was the possibility to use it as a light work equipment, that is, a computer that I can have on hand on my bedside table without it being a complete computer.
While the iPad has many advantages and things that I really liked, it seems the term “Pro” is not enough to have a complete terminal as you can find in an operating system or to have a functional virtual machine, so I decided to investigate if there is an option to use it as a client that connects somewhere else where I can have access to a complete operating system.
In fact, I read an article that suggested using a Digital Ocean Droplet to have a virtual machine in the cloud and from there be able to work. This option is not bad, but having a workstation at home I didn’t see the need to go to the cloud.
Following some of these suggestions I ended up installing Blink Shell that comes with mosh support, and using tmux on my remote Linux laptop I was able to achieve this. Below I explain the details of this configuration.
Blink Shell (ssh / mosh)
The first thing I had to look for was a decent ssh client for iPad. Blink Shell appeared as recurring recommendation on Internet articles. At first, I didn’t like the fact you have to buy it without a trial but since there were several recommendations I gave it a try (USD 19.99 at the date of publication of this post).
I have to admit Blink Shell is very, very good, it’s designed for mobile devices and has support for mosh.
Mosh
Maybe you are wondering as I did, What is mosh? The definition from the mosh page says:
Remote terminal application that allows roaming, supports intermittent connectivity, and provides intelligent local echo and line editing of user keystrokes.
Do you still not understand what mosh is for as it happened to me? It’s like screen but without having to learn commands to create and manage sessions, it also uses ssh under the hood. In other words, you will have the possibility to continue working on your session where you left it off, or if for example your connection was cut and you manage to connect again to another network.
As under the hood it uses ssh, in order to use mosh the syntax is practically the same. Therefore if you used to connect to a server using ssh like this:
ssh lgallard@192.168.1.65
Now with mosh you can connect to the server as follows:
mosh lgallard@192.168.1.65
The change seems simple and with this we now are able to close our iPad or the computer where we are using the mosh client and be able to magically recover the work session when we reconnect.
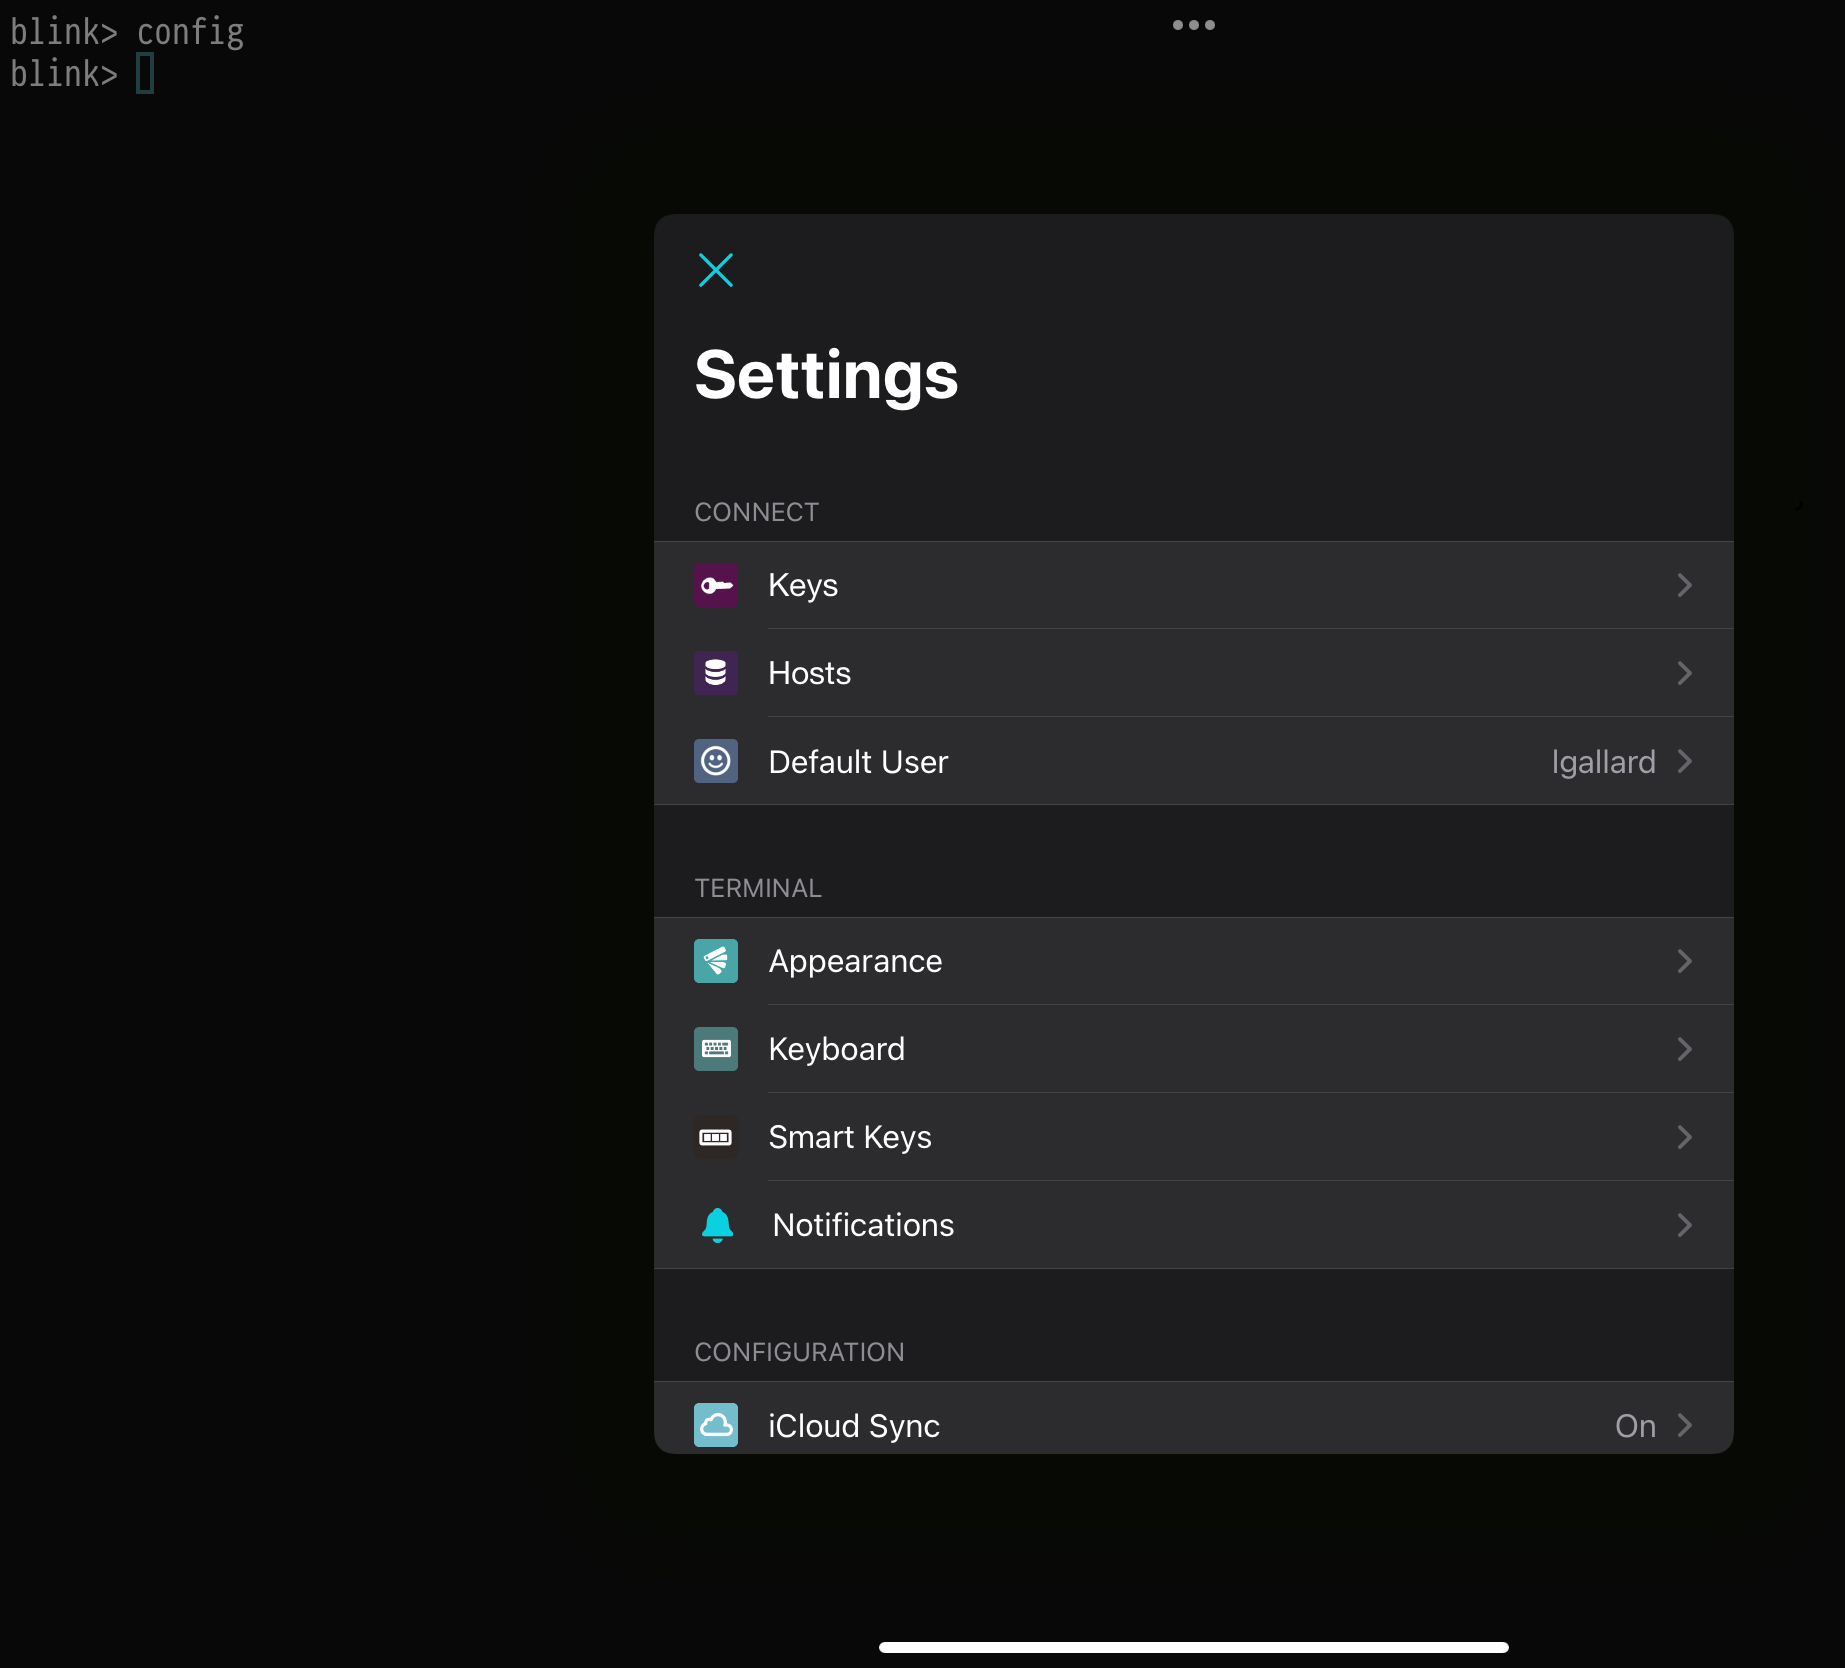
You can configure Blink Shell options by accessing a configuration wizard to have different hosts and ease the connection with a name instead of an IP address. To access this wizard simply type config from the terminal:
In my case now I can connect to my workstation as follows:
mosh dauntless
Mosh, the bad
As a con mosh can’t scroll the terminal, that is, if you need to check the output of commands that you have previously executed and are no longer on the screen, you won’t be able to see them. For me, this was a big problem because when using terraform I lost the plans with the changes to be applied.
This is the way mosh works, to have optimal performance they render the text. There’s an open issue since several years where the developers commented they left it opened as a reference but they have no intention of implementing it. So, is there no solution? Yes, tmux.
What is tmux?
tmux is a tool that allows you to have several terminals open (or windows) to be accessed and controlled from a single terminal as we would do with screen.
You have to install tmux on the computer where we want to log in and once installed it’s enough to run this from the mosh client (the iPad Pro in my case):
mosh danuntless -- tmux new -s terminal-1
This way we can create a new session whose name is terminal-1. Then to access this session later you have to run the following:
mosh danuntless -- tmux a -t terminal-1
Enabling scrolling on tmux
On the remote workstation you must configure mosh to have scrolling enabled using tmux, to achieve this edit the ~/.tmux.conf file with this content:
new-session
set -g history-limit 30000
set -g mouse on
Blink + ssh + mosh + tmux … eh?
“Wait a moment … Blink + ssh + mosh + tmux, Are all these too complicated? Isn’t it better to use ssh with screen? “. Yes, it’s an alternative, but with ssh you would not be able to reconnect automatically and you will have to log in again if you close the iPad or if your IP address changes for some reason (for example, if you change your connection from WiFI to cell phone) or if the ssh session expires.
I have to admit there’s a learning curve to cover with tmux but once passed you will love it and wonder why you didn’t use mosh and tmux before.
More about tmux
If you want to learn how to use tmux I leave you a cheat sheet with the commands you can use. In my case, I found the panels division and the use of zooming between them very useful, but I must admit that copying text between panels is somewhat complicated on the iPad and sometimes I prefer to use vim for this, but I will surely find a workaround.
Final words
Here I comment my experiences with the iPad Pro, but all these can be replicated on an iPad Air and even use mosh and tmux from other workstations with Linux or Windows.